


Workflows Section: This area displays existing workflows, with the title Workflows and the number 5, indicating six workflows exist. Below the title, there is a Quick search bar to filter workflows.
The table lists the workflows with four columns:
- Name: A descriptive name for the workflow.
- Event: The event that triggers the workflow. For example, “Booking status changed” or “New booking.”
- Action(s): The action performed when the event is triggered, such as sending an email or a Telegram message.
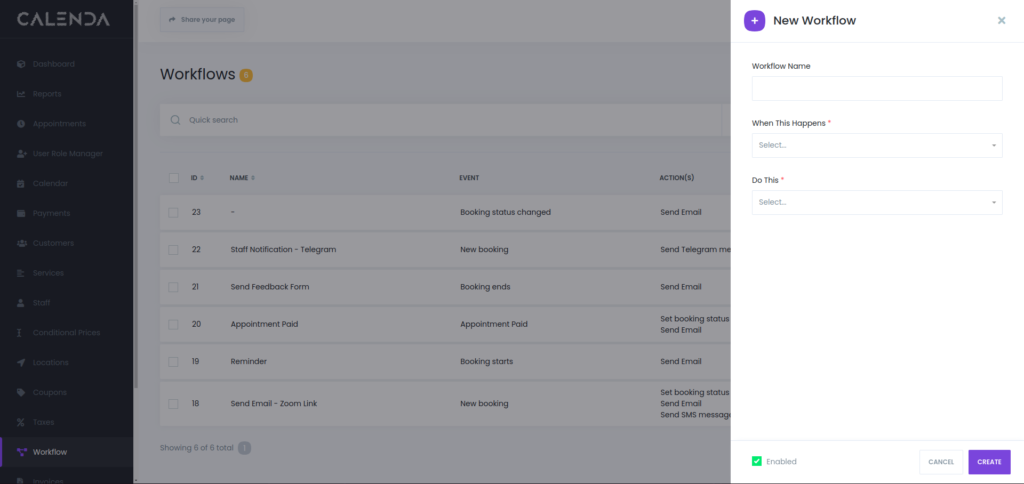
The modal allows users to define automation rules based on specific events and actions.
1. Workflow Name:
The first field prompts the user to enter a Workflow Name. This is a text input field where the user can give a descriptive title to the workflow.

2. When This Happens:
The section allows the user to define the event that will trigger the workflow. It is marked with a red asterisk (*), indicating that it’s a required field. The drop-down list for this field is expanded, showing the available event options:
- New booking: Triggers the workflow when a new booking is made.
- Booking rescheduled: Triggers the workflow when a booking is rescheduled.
- Booking status changed: Triggers when the status of a booking is updated.
- Booking starts: Triggers when a booking begins.
- Booking ends: Triggers when a booking ends.
- New customer created: Triggers when a new customer is added to the system.
- Customer forgot password: Triggers when a customer forgot his passwordز
- Customer reset password: Triggers when a customer reset his password
- Appointment paid: Triggers when an appointment is paid
- Customer signs up: Triggers when a customer create an account
- New Rating: Triggers when the user selects one of these options to define the event that will initiate the workflow.

3. Action Selection:
Below the event selection is the Do This section, also marked with a red asterisk (*), indicating another required field. Here, the user selects the action(s) to be performed when the specified event occurs.
- Set booking status
- Send Email
- Send Telegram message
- Send SMS message
- Send WhatsApp message
- Send HTTP(S) request
After you create those 3 steps, click on “Create.”
Click When to filter this workflow by specific criteria such as location, staff, or appointment status. The options available in the When field may vary depending on your selection in the When This Happens field. For example, in the reminder setup, you’ll see an Offset option, allowing you to trigger the event before or after the appointment by a specified interval (e.g., X minutes, hours, or days).

Redirect to Detailed Setup:
Once the initial workflow is created, the system will automatically redirect you to a detailed workflow configuration page. Here, you will see three main sections:
- Workflow Name: Displays the name you provided. You can edit it if needed.
- When: This shows the trigger event you selected earlier. You can click Edit if you want to change this condition.
- Do This: Displays the action (e.g., “Send Email”) that needs further configuration. Click on Setup to continue the configuration needed

In the To field, select whether to send the email to the customer or staff. In the Subject field, enter the necessary information, and use the tag icon to include personalized details such as the recipient’s name, appointment date, etc. Repeat this process in the email body, then click Save.

To test the email, click Save and Test to send a test version and preview how it will appear to the recipient.
Enabled Checkbox: At the bottom of the modal, there is an Enabled checkbox. By default, this checkbox is selected, meaning the workflow will be active as soon as it is created. The user can uncheck this if they wish to create the workflow but leave it inactive for the time being.