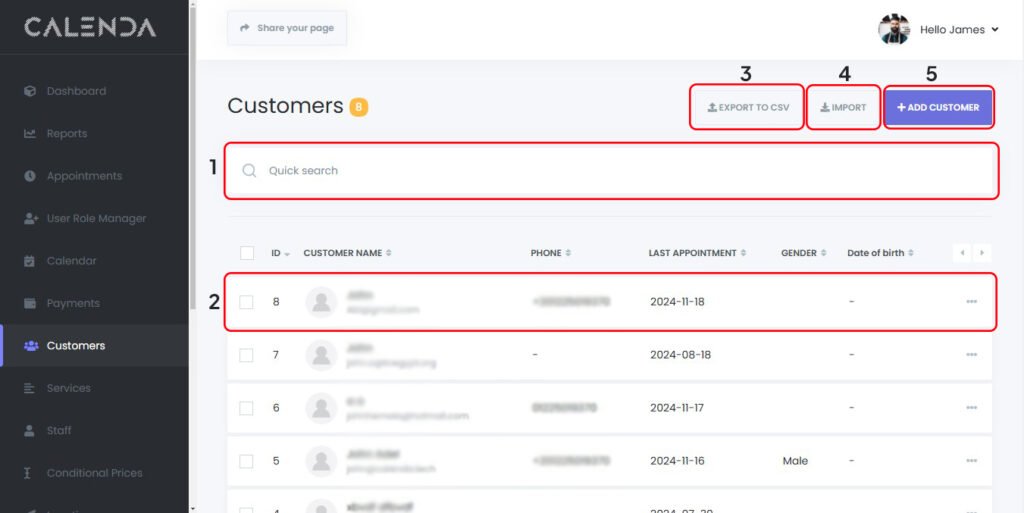
- Quick Search: A search bar that allows users to quickly search for customers using keywords like customer name
- Appointments List:
- Displays all the appointments in a tabular format.
- Columns:
- ID: A unique identifier for each appointment.
- Customer Name: The name and email address of the customer.
- Phone: The phone number of the customer if available
- Last Appointment: The date of last appointment reserved by the customer
- Gender:
- Date of Birth:
- Export to CSV: A button that allows users to export the list of appointments into a CSV file for external analysis or record-keeping.
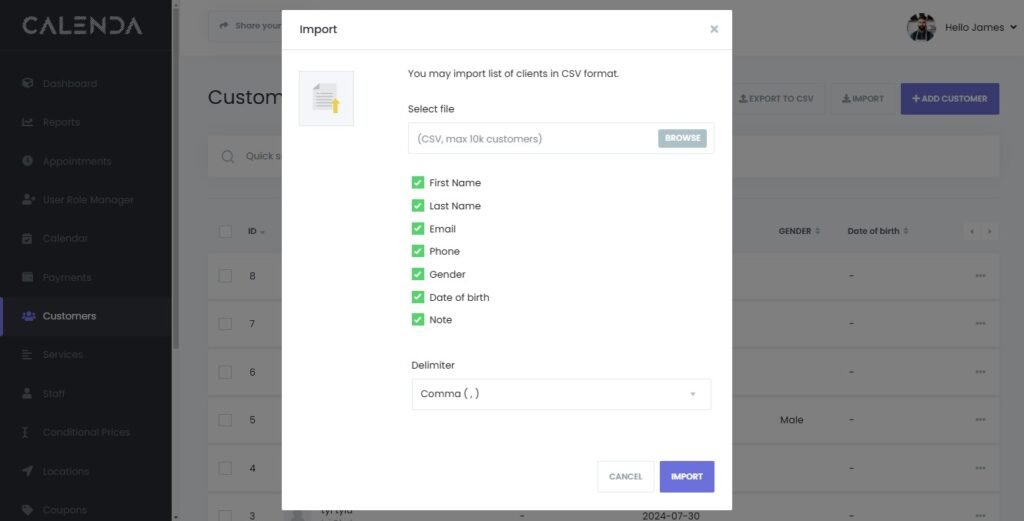
- Import: Import CSV file containing all information of the customer, make sure to follow the following steps:
- Download CSV Template: To make sure you are following the correct format, you should first export an empty CSV file. This is done by clicking the “Export to CSV” button, even if no customer data exists. The exported file will be in the correct format with all columns ( make sure to select all )
- Editing the CSV: Once you have the empty CSV file, you can open it in Excel or any CSV editor. It will contain headers such as First Name, Last Name, Email, Phone, Gender, etc. Do not remove any of these columns—even if you don’t have data for a particular column. For instance, if you don’t want to enter emails for your customers, leave that column blank but still keep the header in place.
- Filling the Data: Enter the data in the CSV, making sure each value aligns correctly with the columns.
- Importing the File: After editing and saving the CSV file, go to the import dialog box (as seen in the image) and select your edited file by clicking on “Browse.” Ensure that all the checkboxes (for first name, last name, email, phone, etc.) are ticked. These checkboxes must remain selected, even if the columns are empty, so that the system recognizes the structure.
- Delimiter Selection: Ensure the delimiter is set to “Comma (,)” because this is the format typically used in CSV files.
- Final Step: After all this, click “Import,” and the system will read your CSV file and upload the data accordingly.

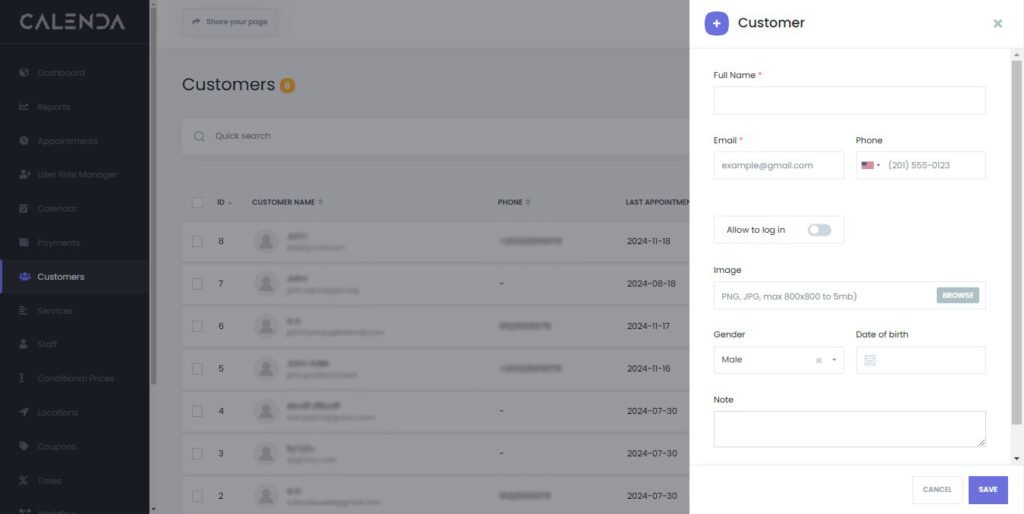
5. Add Customer: Add a new customer. Fill in all the details to create a new customer

Note: To change the customer identifier from email to phone number, click here to learn how – under Information section.

