

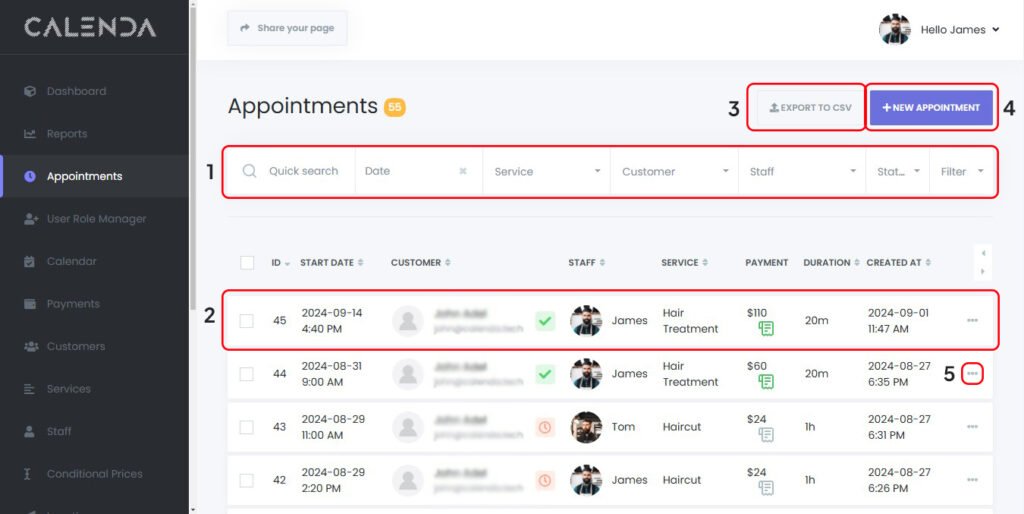
- Search and Filter Options
- Quick Search: A search bar that allows users to quickly search for appointments using keywords like customer name or service.
- Date Filter: A dropdown or date picker to filter appointments by date.
- Service Filter: Allows users to filter appointments based on the service provided (e.g., Haircut, Hair Treatment).
- Customer Filter: Enables filtering by customer name.
- Staff Filter: Filters appointments based on the staff member assigned.
- Status Filter: A dropdown to filter appointments by their current status (e.g., confirmed, canceled).
- Additional Filters: Offers more advanced filtering options to refine the appointment list.
- Appointments List
- Displays all the appointments in a tabular format.
- Columns:
- ID: A unique identifier for each appointment.
- Start Date: The date and time the appointment is scheduled to start.
- Customer: The name and email address of the customer.
- Staff: The staff member assigned to the appointment, with a status icon indicating their availability or status (e.g., checkmark for confirmed, red icon for unavailable).
- Service: The service that is being provided (e.g., Haircut, Hair Treatment).
- Payment: The amount charged for the service, with an icon that may indicate the payment method or status.
- Duration: The length of time allocated for the appointment (e.g., 1 hour, 20 minutes).
- Created At: The date and time when the appointment was created in the system.
- At the end of the row, you can find 3 dots where you can edit the appointment, change its status or delete the appointment.
- Export Option
- Export to CSV: A button that allows users to export the list of appointments into a CSV file for external analysis or record-keeping.
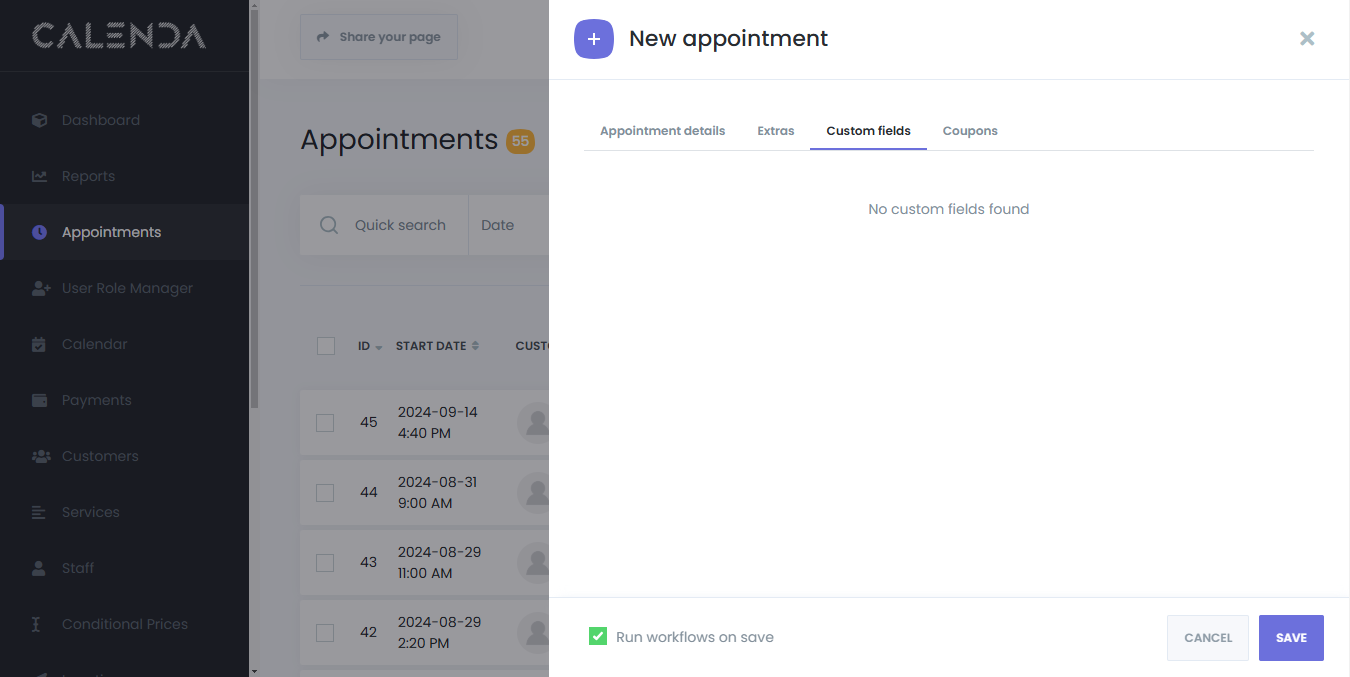
- New Appointment Button
- Appointment Details
- Location (required) – Dropdown to select a location.
- Category – Dropdown to select a category.
- Service (required) – Dropdown to select a service.
- Staff (required) – Dropdown to assign staff members.
- Customer (required) – Dropdown to choose a customer (with options to add a new one).
- Note – A text field for additional notes related to the appointment.
- Status – Displays the current status of the appointment, defaulting to “Pending.”
- “Run workflows on save” checkbox – This option ensures that any workflows associated with this appointment will be executed when saved.
- Appointment Details
- More Options
- Info: Get detailed info about the selected appointment
- Change Status: You can change the status of the appointment to (Pending, Approved, Canceled, Rejected)
- Delete: Delete the appointment
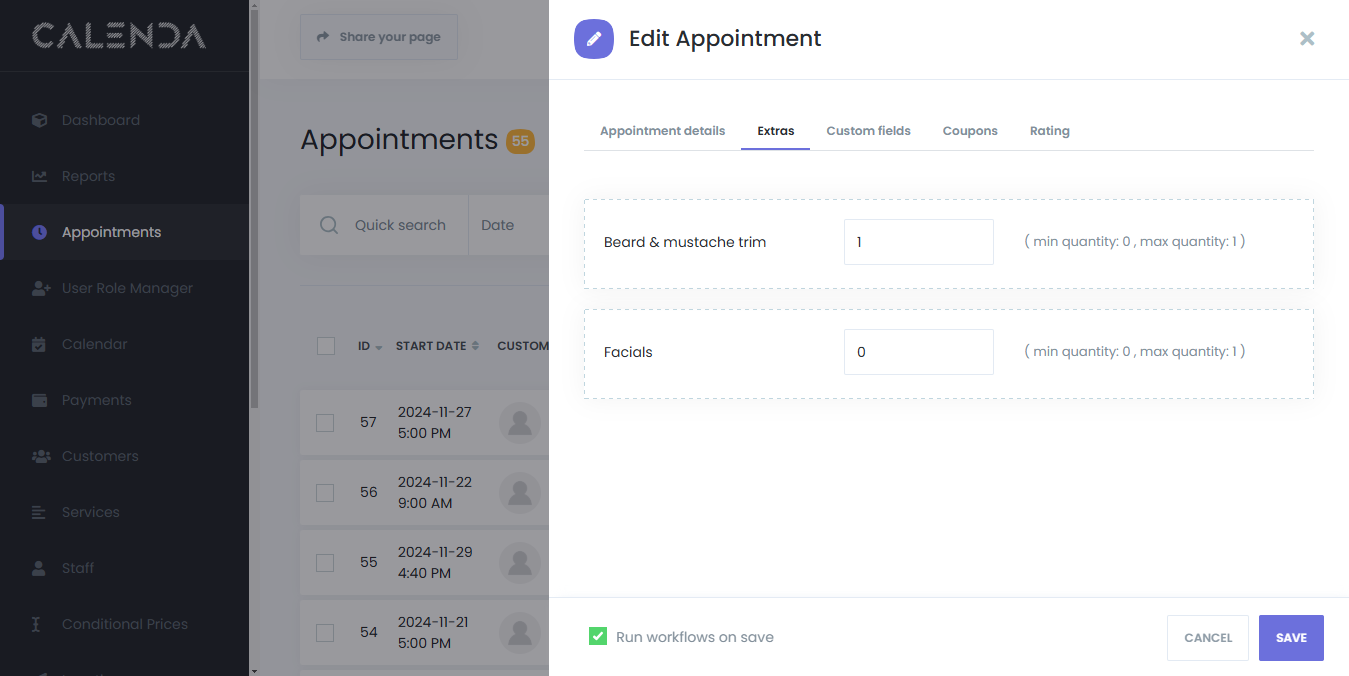
- Edit: After booking an appointment you can still edit and change any entries.
Lets start with New Appointment button (number 4):

- Extras: This section displays any extra services linked to this appointment.

- Custom Fields: If any custom forms are associated with this appointment, the custom fields will be displayed under this tab. (You won’t find any here, as you are the one completing it on behalf of your customer.)
- Coupons: To apply a coupon to this appointment, click the dropdown menu and select one from your available coupons.

Now lets go to More Options button (number 5):
- Info: Get detailed info about the selected appointment
- Change Status: You can change the status of the appointment to (Pending, Approved, Canceled, Rejected)
- Delete: Delete the appointment
- Edit: After booking an appointment you can still edit and change any entries.

If the customer booked any additional services it will appear here. You can add or remove any extras:
If any custom forms are associated with this appointment, the custom fields will be displayed under this tab.

If a coupon is applied to this appointment, it will be displayed here. If no coupon is used, this section will show “none.”

If the customer rated the service it will appear here, and if any review was written.
